
It is only natural to want to share it. Some may remember when heroku's free tier makes it possible to install applications immediately with Conform Conform. That period is gone for a long time, and Options to show simple ML applications into very limited.
Why do you suffer displays the app for the first time? The reasons are many. Putting your work without let you gather a real answer from the people they try, more important than keeping you. It also gives you the opportunity to create a portfolio more about any CV. Sharing your app and opens departments together, it helps you test that your ideas solve real problems, and create opportunities you could not expect. Displaying your work is about reading, improving and reliability.
If you want to put your online work or create a small project portfolio, refreshing faces are one of the best places to start. It's free, easy to use, and lets you use machine learning applications. You can force any form of demo you want and share with others in minutes.
There is a large collection of apps that work in the spaces, covering everything from picture models and images on full use tools. Browsing for them in Gaggingfatfato.co/space gives you a sense of possible and most inspiration for your projects.
In this blog study, I will travel by a short reading on how to use your greeting Hugging. The goal is to show how easy it is to take the project on your local machine and make it accessible to anyone online.
To create your account
First, you need to create an account at the face of face:
Ok, now let's look for the closing spaces. That's where everything happens and you will set your environment, select the outline you want to work, and start building an app you want to share.
The head has gone to the menu:

Here you can view many apps designed for other users – and this when our application will appear when it is sent. In the meantime, however, we will leave the face of face, because we still need to create an application that prepares sending.
Creating an app in your area
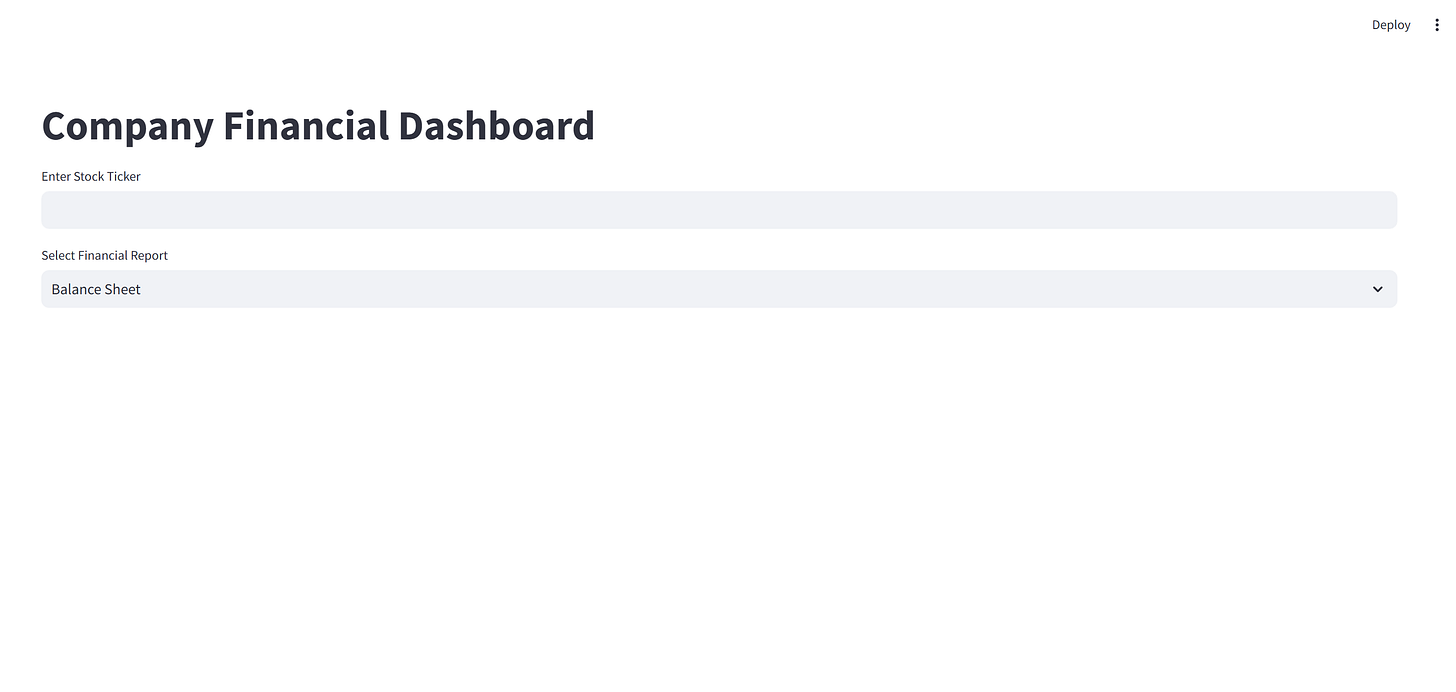
On my computer, I will start by setting a simple version of a simple stream that reflects the financial data of any stock. Keeping things straight, the entire app will last in one file called app.py.
This slight set makes it easy to follow and focus on important things before we move you.
import streamlit as st
import yfinance as yf
import plotly.express as px
import pandas as pd

st.set_page_config(page_title="Company Financials", layout="wide")
st.title("Company Financial Dashboard")

ticker_input = st.text_input("Enter Stock Ticker")

# Choosing financial report type
report_type = st.selectbox("Select Financial Report",
                           ["Balance Sheet", "Income Statement", "Cash Flow"])

if ticker_input:
    try:
        ticker = yf.Ticker(ticker_input)

        if report_type == "Balance Sheet":
            df = ticker.balance_sheet
        elif report_type == "Income Statement":
            df = ticker.financials
        else:
            df = ticker.cashflow

        if df.empty:
            st.warning("No financial data available for this selection.")
        else:
            st.subheader(f"{report_type} for {ticker_input.upper()}")
            st.dataframe(df, use_container_width=True)

            df_plot = pd.DataFrame(
                df.T,
                pd.to_datetime(df.T.index)
            )
            metric = st.selectbox("Select Metric to Visualize",
                                  df_plot.columns)

            if metric:
                fig = px.line(
                    df_plot,
                    x=df_plot.index,
                    y=metric,
                    title=f"{metric}",
                    markers=True,
                    labels={metric: metric, "index": "Date"}
                )
                st.plotly_chart(fig, use_container_width=True)

    except Exception as e:
        st.error(f"Error: {e}")
Let's see this Support The app in your area:
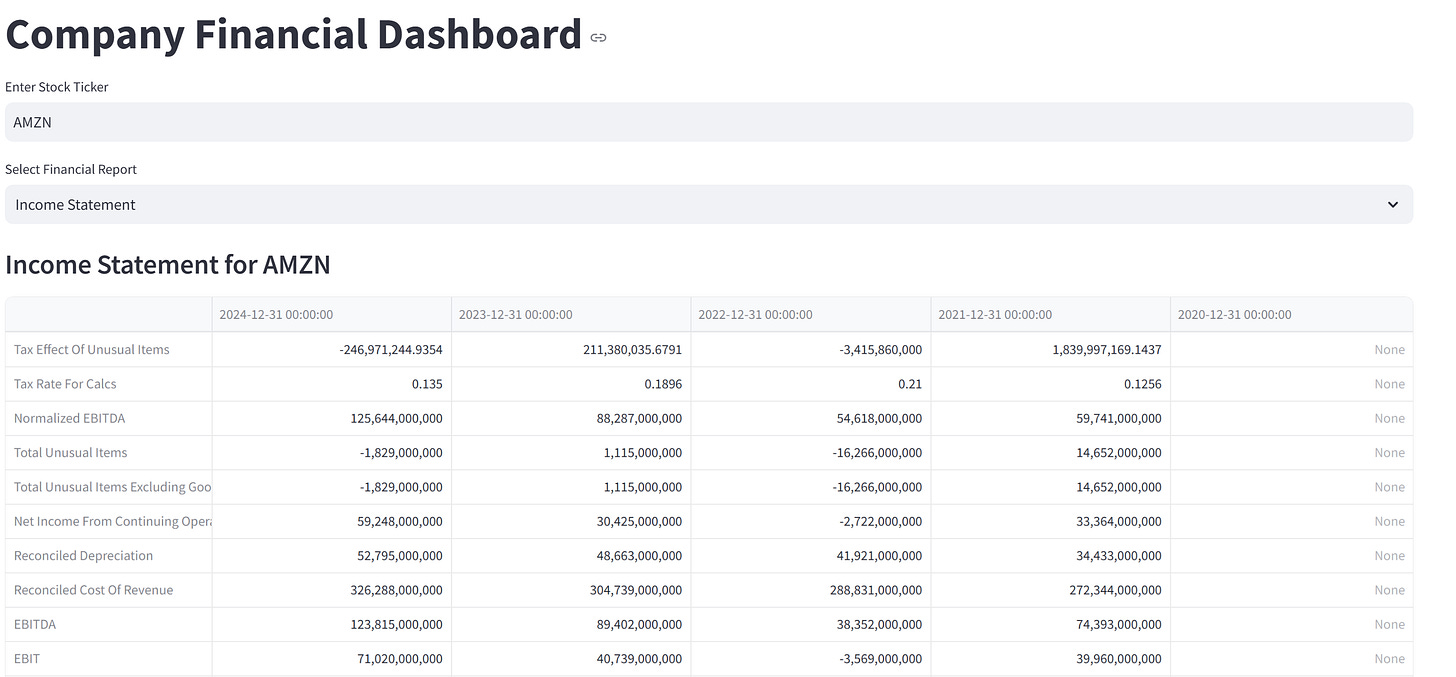
Through an active app, I can type a word or tape of any stock and pull it according to its finance. For example, when I enter the Amazon ticket signal, AmnThe app will show the company's finance correctly.
This makes it easy to explore advanced figures without digging with long financial reports or jumping between different websites.
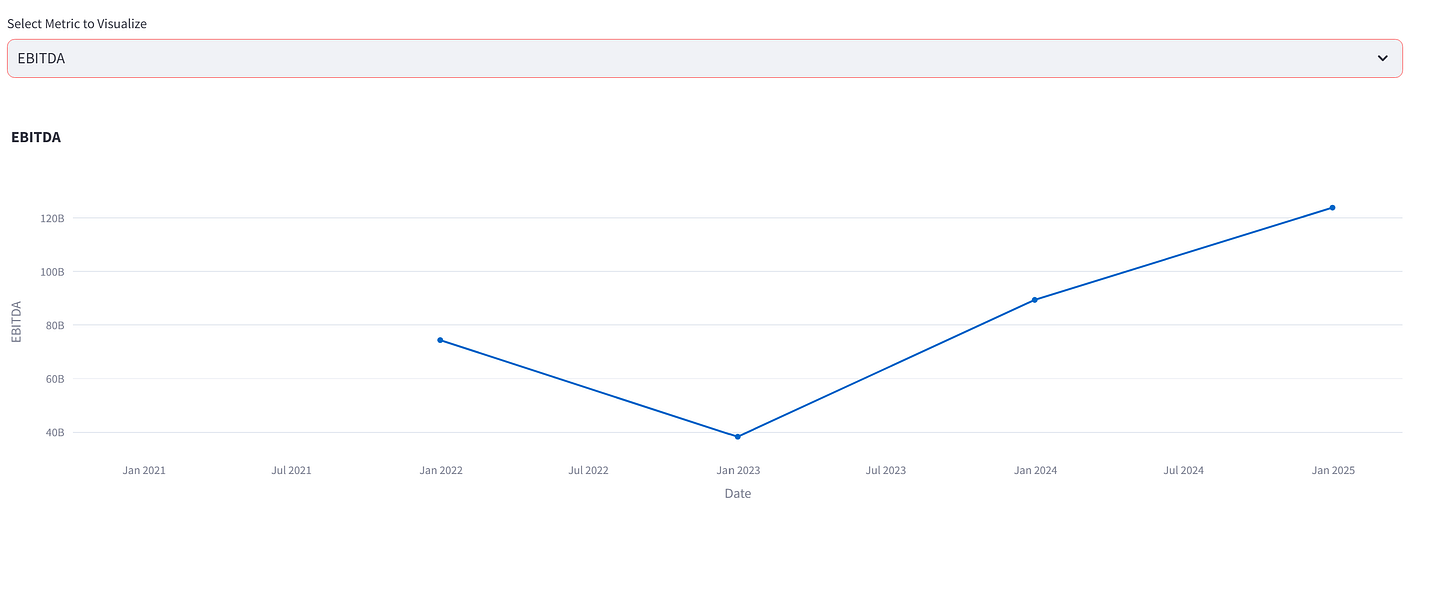
I also configure the app to draw a line line any of the metric I choose. If you are slowly browsing, you will see the following:
You might think, “This looks interesting – I would like to try myself myself. Can I?” The answer, yet, no.
The app only works on my computer, which means you may need access to my PC to use it. That's why the address appears as localhost It seems only to me:

And that's where the distance there will help us!
Building a Better Location
Now let's go to Huggingface.c/spaces and click “New Space” to start.

After clicking “New space“Button, we can start set up the environment that will increase our application.
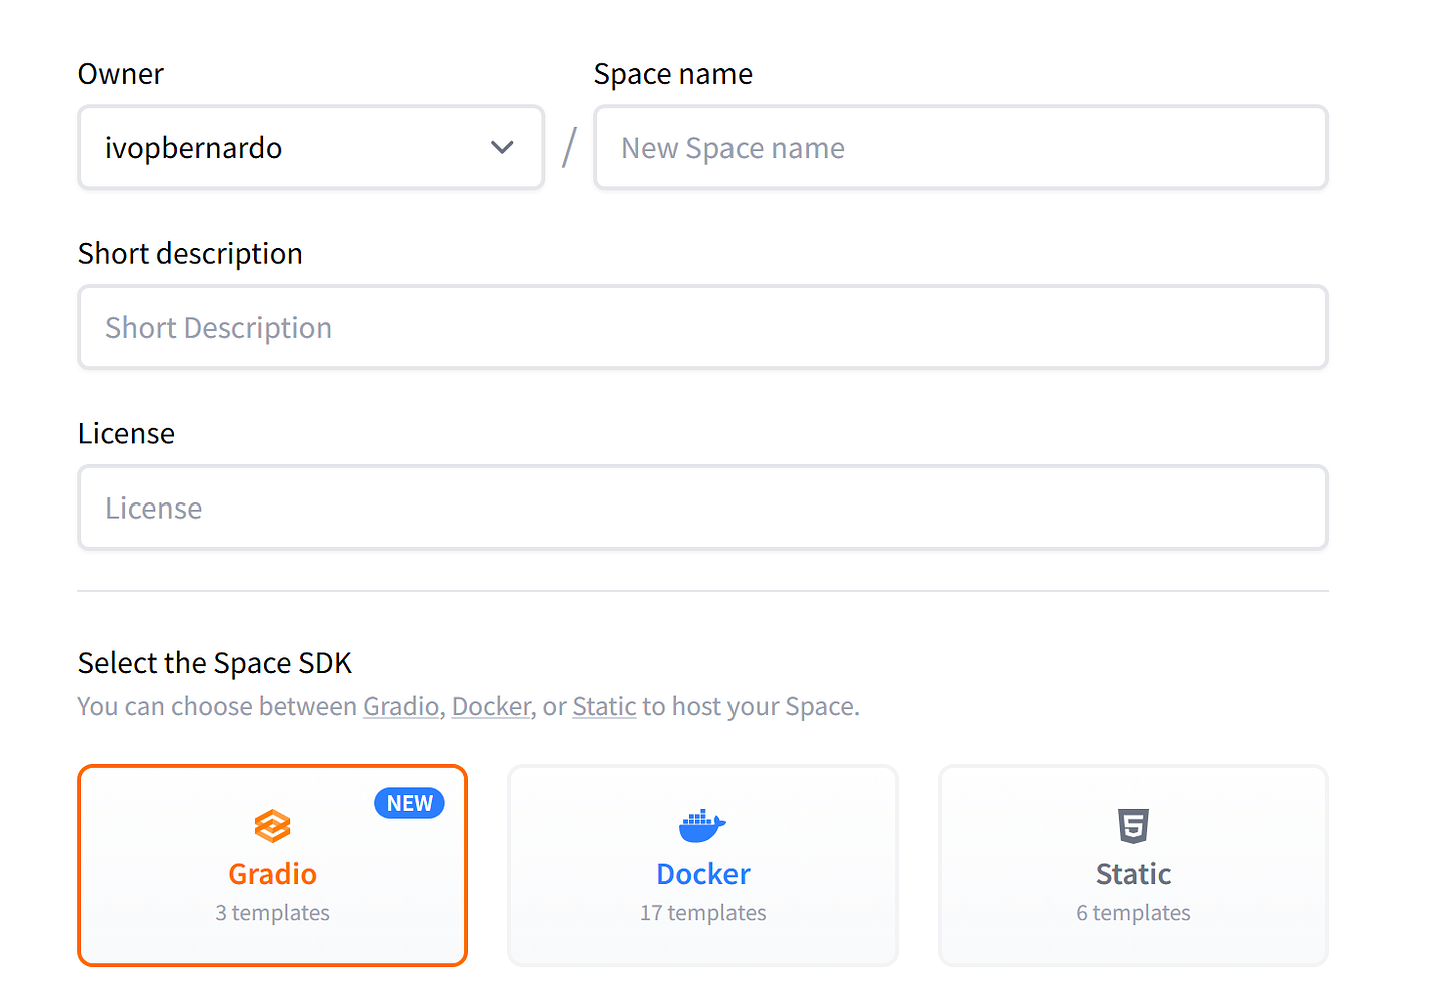
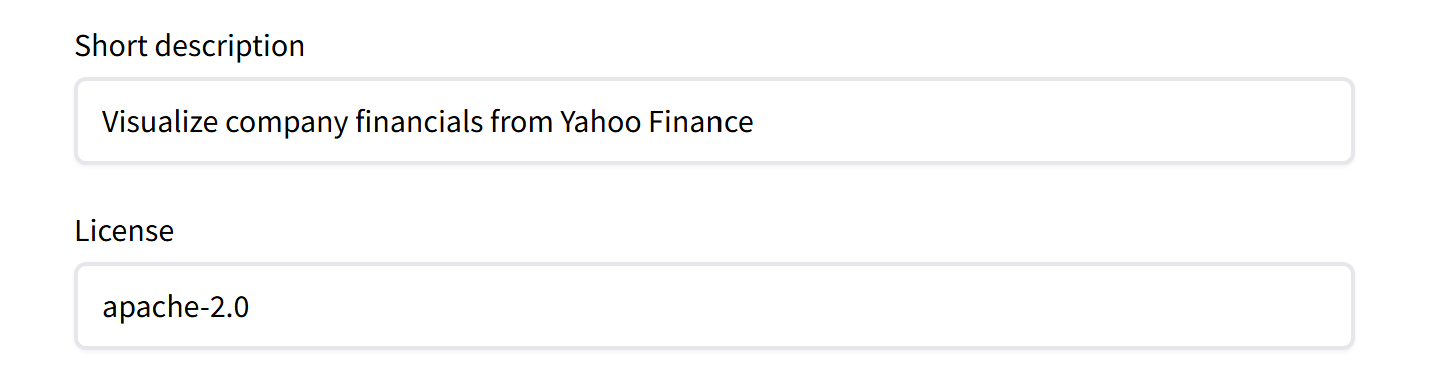
Here, I will name the project MonicaleappleAploreAdd a brief description, and select License (in this case, Apache 2.0):
Finally, as the app is built with streamlit, I need to make sure that well prepared. On the setup screen, I will chooseDesigner as a basis and select Support as a frame. This step tells facial hugging how to use the app and everything works well when it is sent.
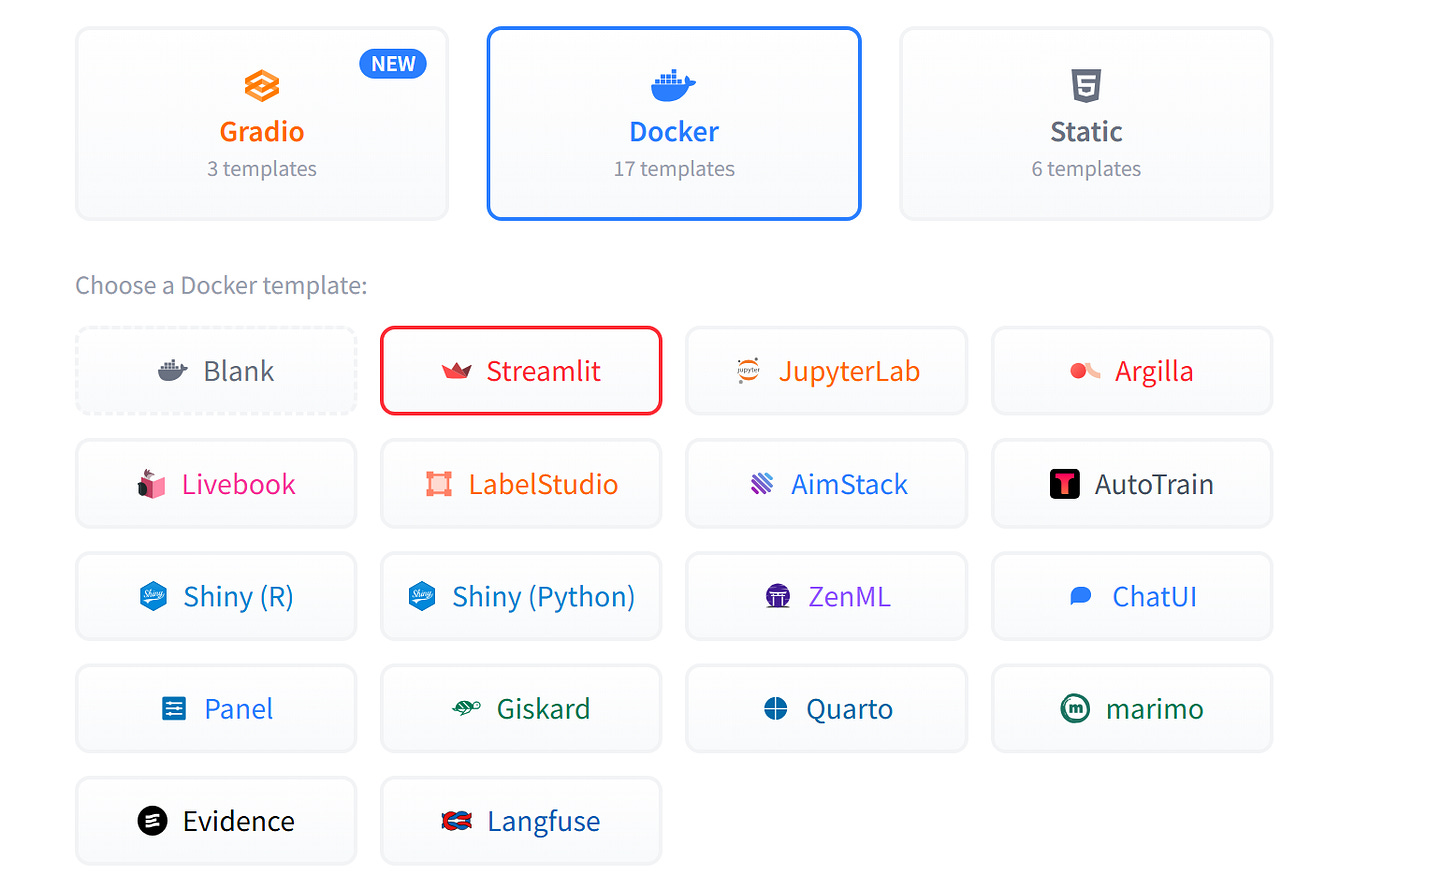
If you use a different framework (like a shiny), be sure to pick it here. That way, the Dockeer image is designed for your space will install the relevant packages and libraries of your application to run properly.
When it comes to Computing, I will select a basic version. Remember that this is the only free hardware in HuggingsCice posts, if you need more computer capacity You can get certain costs.
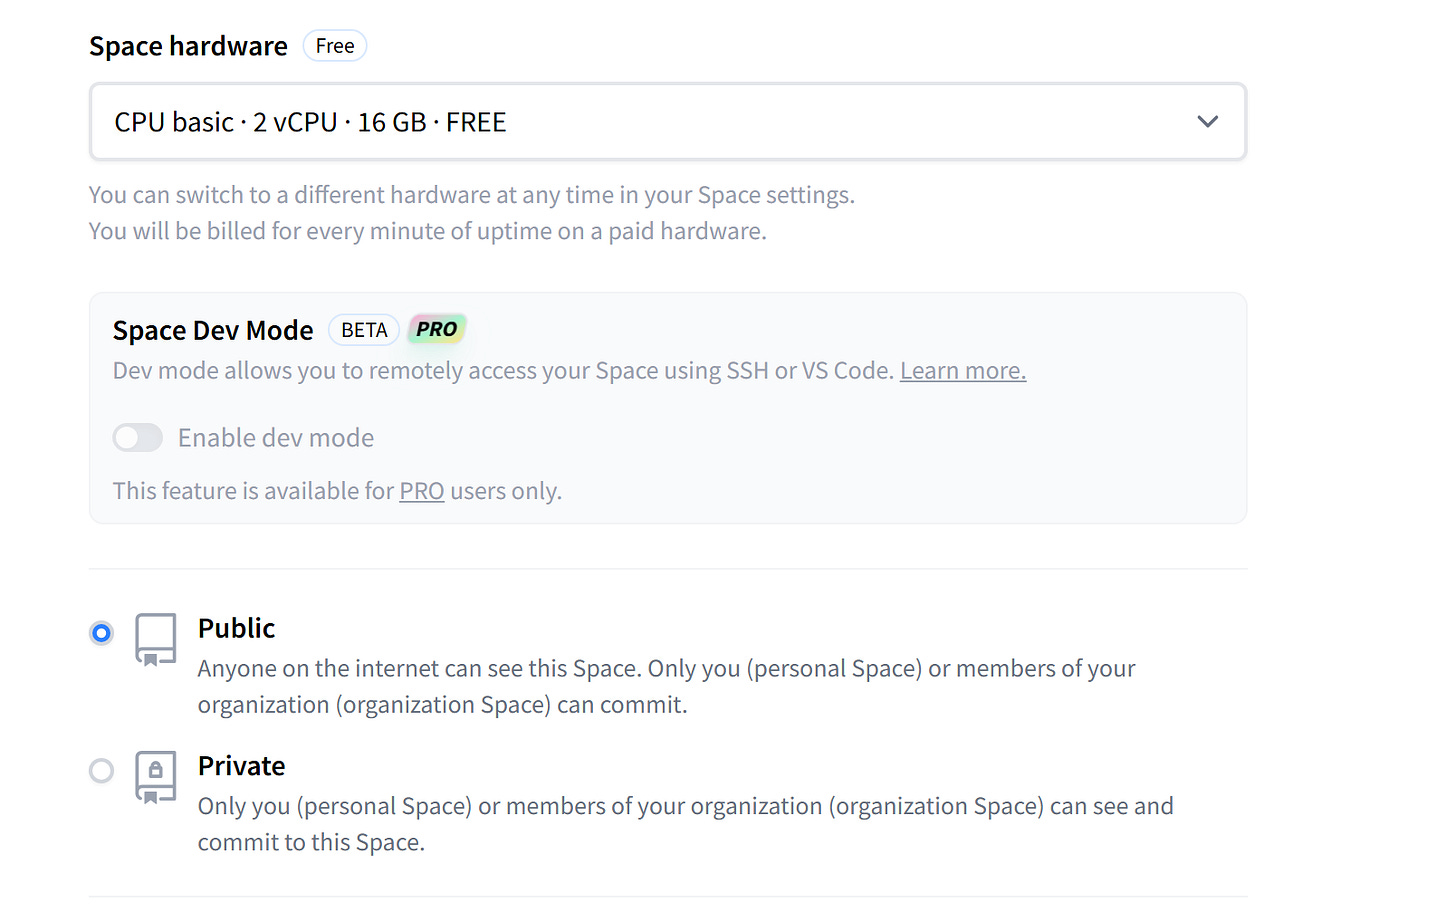
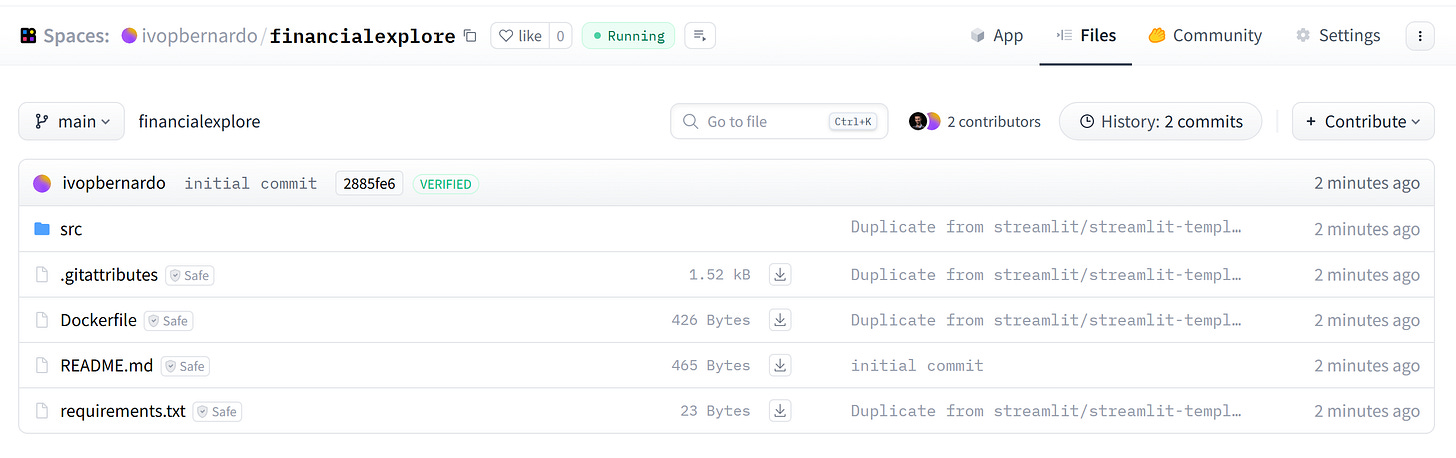
I will keep my space in public so I can share here in this blog post. On all local settings, I just hit “Create a Space“.
Kisses face and take over the cables and begin to build the environment, get everything ready for the app to run.
When the Sugging Place my space is made, I can open it and see the default Template of Straditlit Running. This template is a simple startup place, but useful because it shows that nature is active as expected.
With a ready Space, now it's time to use our app on it.
Using our app in space
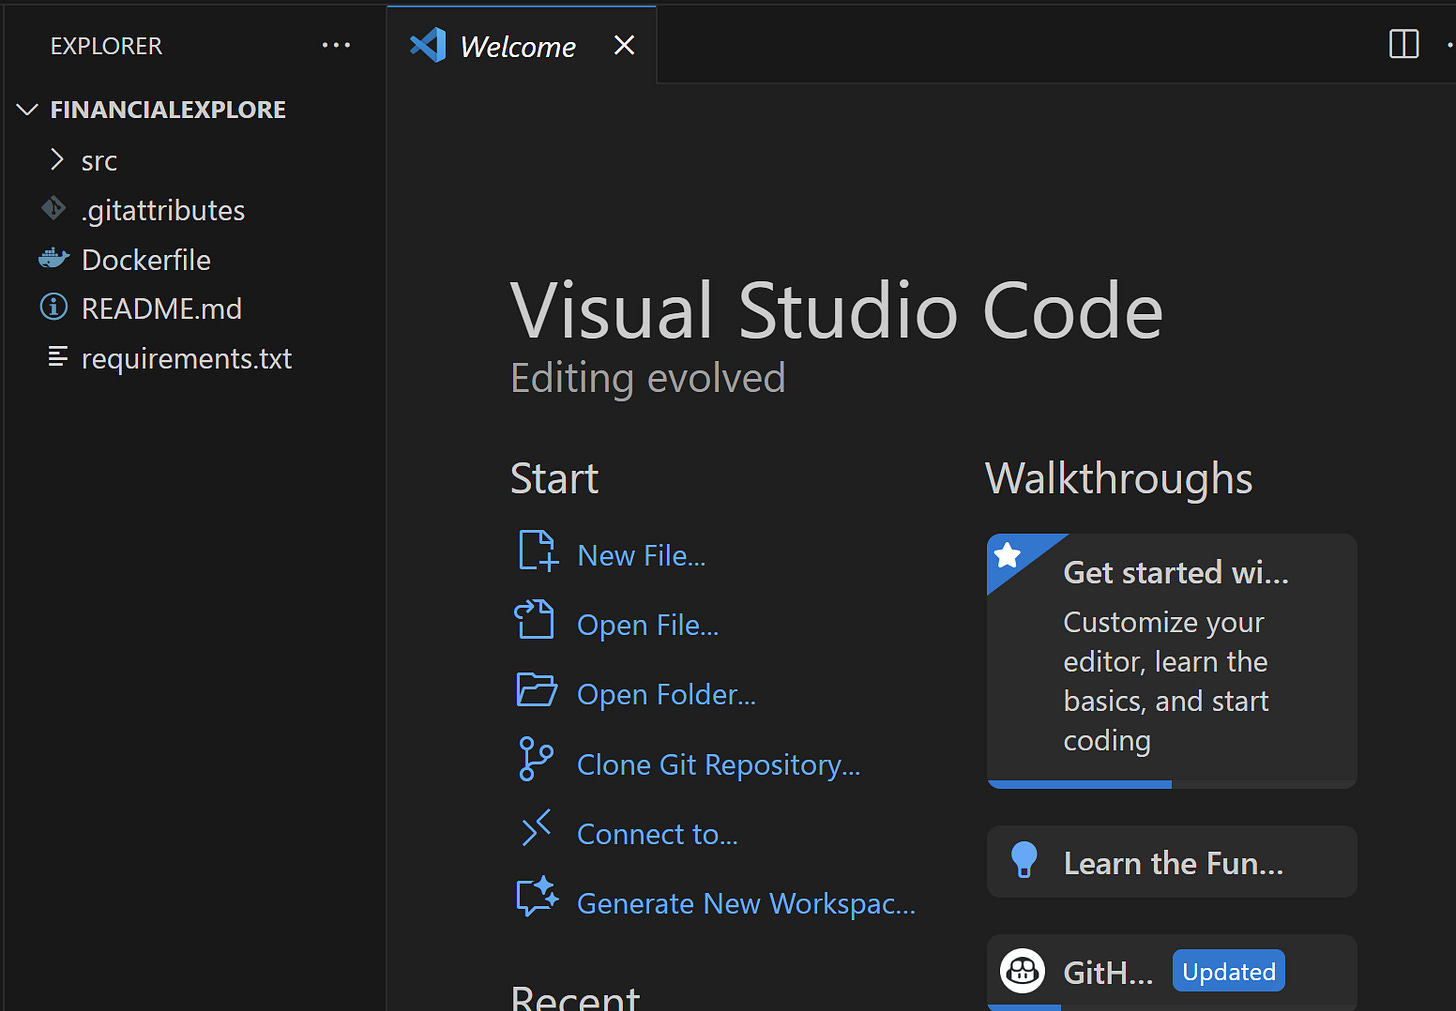
I can load the files manually, but that will get too quickly and a tendency error. The best option to treat a space similar to a git indicator, meaning I can make us straight on my computer at one command:
git clone By installing space for this area, I get all the files in my machine and can work with them like any other project. From there, I just let my app.py and other files I need.
Now it's time to bring everything together and get the app ready to go. First, we need to review a few files:
– Requirements.txt: Here I will include additional libraries for my app needs, such as plotly including yfinance.
– Assamlit_app.py: This is the main entrance. Keeping things simple, I'll just copy the code from me app.py to src/streamlit_app.py. (If you would like to keep your app.pyYou need to correct the Docker Config rightly to introduce this file).
With those changes in the area, we are ready! I will do directly to main Branch, but you can set your own work fluctuations if you like.
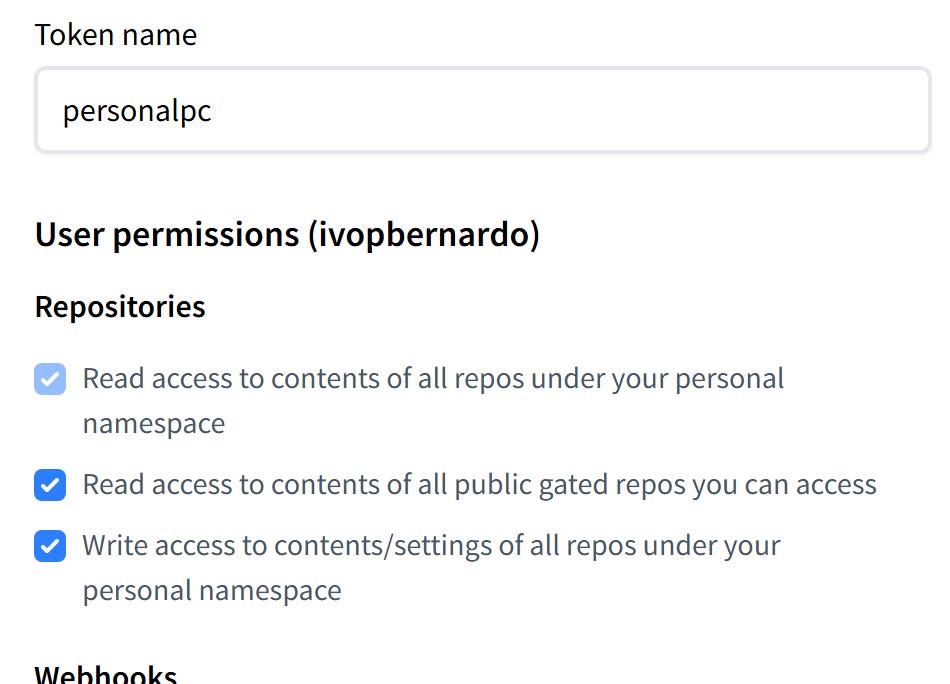
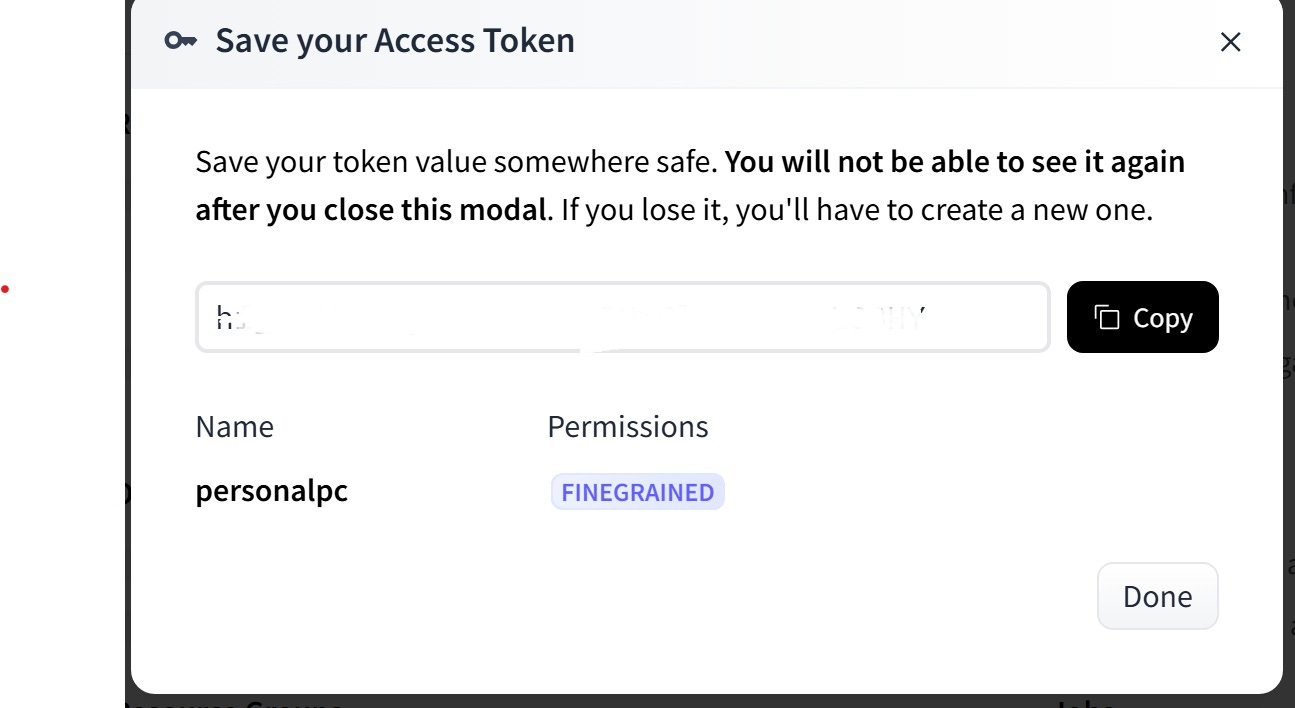
One one is held, however: your computer will not have permission to press the code on the score of the face. To adjust this, you will need access token. Just look up to kiss.co/seetting/tokens, click “New Token,” and build one. That Token will allow you to confirm and press your code in the space.
I will drive token SoundPC and provide reading / writing permissions to all my regos on my Huggapp account:
Once you have created token, you will see it recorded in your account. Mine hidden below for security reasons. Make sure to copy them immediately and keep it in a safe place. I recommend you use a password manager as 1Password, but any safe password manager will. You will need this information later to connect your local settings to refresh the face.
When you press your changes to repo, the Git Credential Manager will impel the username and password.
Note: This comes up immediately if git is installed on your own machine, not with the expansion of the view code.
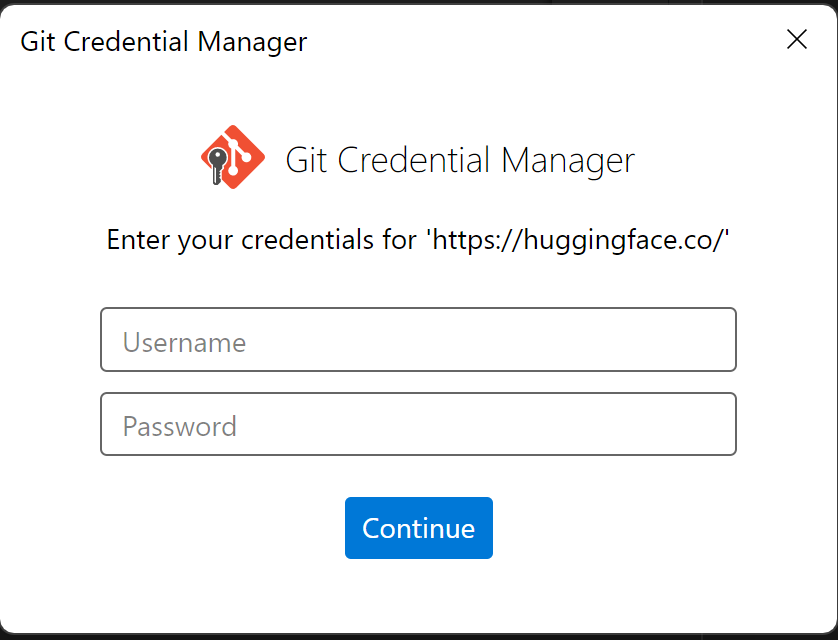
Enter your GitHub username, and password, attach a newly made token.
Veor! After participating, changes now live in your repo. From this point on, you can work as just you would like any other place to save things.
To view our live app
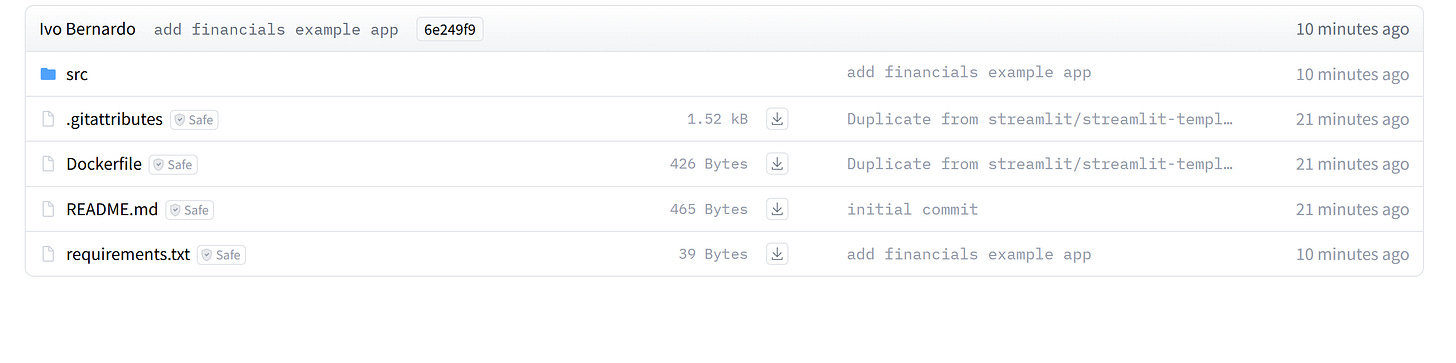
As shown below, our code is already updated:
But better, let's look in the App Menu:

And so like, the living app, running online as it happened to my computer.
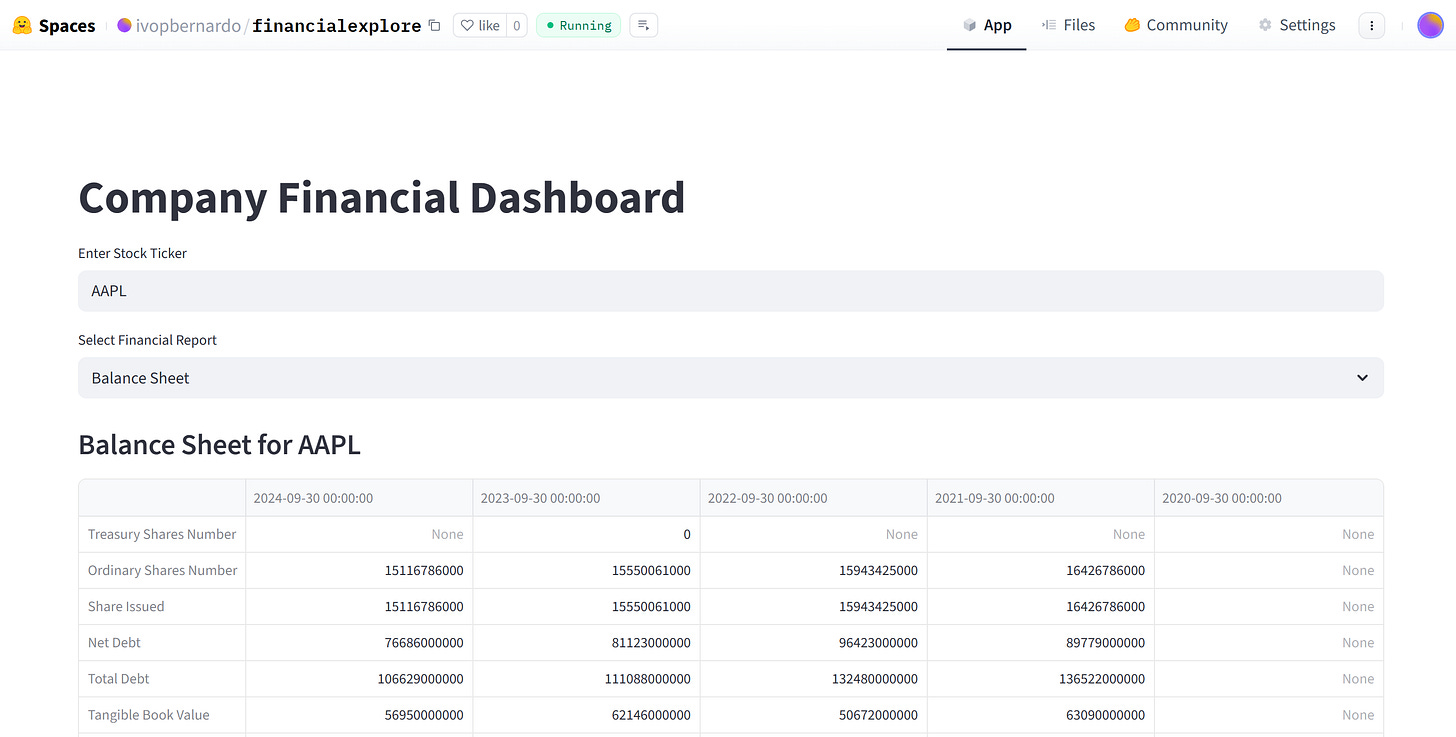
Follow this link to see it alive.
If you want to show your work or share your ideas, facial spaces are one of the simple and most effective ways to do. You can start a little with one file, or build something you wish. The platform cares for the hostage, so you can focus on building and share.
Don't be afraid to try and play all around. Even the easiest demo can be the start of your project portfolio. Feel free to share your apps in a comment!


